 |
The instructions in this article relate to Roll. The icon may be located on your StrataMax Desktop or found using the StrataMax Search. |
The Roll is used to manage lot owner information, including ownership changes and updates to details. This article details the latest features and functions of this menu, including how to add and edit contacts. A contact is associated with records throughout the system. The same contact can be linked to different screens and menus, such as the Roll and Office Bearers. In addition, multiple contacts can be linked to a single lot.
When editing a contact, the system automatically uses validation to ensure contacts aren't being changed completely instead of performing a Change Of Ownership, for example.
- Full change of the Given or Surname fields on initial creation of the contact.
- Small edits to Given or Surname fields at the same time after the initial save.
- Full change to the Given or Surname fields if the other is not changed.
For an overview of the Roll, including configurations, see Roll | Configuration and Overview.
What is a Contact?
A contact is a person or company that can be "inserted" into various appropriate screens in StrataMax - the obvious two being an owner in the Roll and a committee member in the Office Bearers screens. In addition, the Roll allows you to insert multiple contacts into a single lot. Contacts are not limited to owners or office bearers; they can also be letting agents, nominees, tenants, etc.
A contact exists in its own right and is displayed in multiple areas throughout the system. When a change is made to a contact card, there is no need to update or synchronise it, as all applicable areas within StrataMax reference the same contact card. If the contact has been added as an owner in the Roll and as a Secretary in Office Bearers, and the contact details are modified, the changes will be visible in both areas, regardless of where the contact card was edited.
This simple diagram should illustrate how a contact works and is displayed across areas in StrataMax.

Quick Search for Owners
Finding an Owner can now be done simply using the StrataMax Search bar. Using any of the noted contacts, you can quickly find an owner, either for a single record or for clients with multiple drives (if the record is on another drive, it will open directly in that drive).
- Name of Owner.
- Email contact.
- StrataPay Reference Number (in full).
- Lot Address.
 |
 |
 |
Quick Reference Guide
This section is a quick guide to changing a lot's ownership and updating a lot's contact details. If you are unfamiliar with the Roll screen, we recommend reviewing the rest of this article and the Roll Configuration and Overview article. We also recommend watching the Roll and Contact Management Video.
QRG Change of Ownership
- Search or select Roll. In the Account Code List, select the relevant lot and click OK.
- In the Roll screen, click the Change Ownership button.
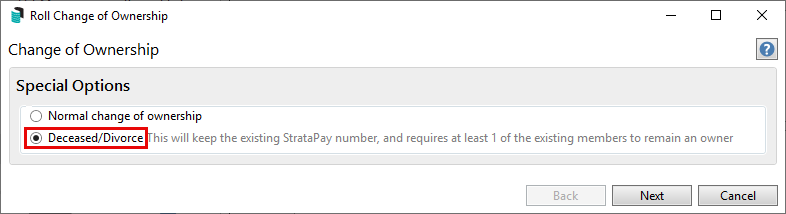
- If there is more than one Contact on the lot, you will be prompted to select if this is:
- Normal change of ownership.
- Deceased / Divorce (this will keep the existing StrataPay number, and requires at least 1 of the existing Contacts to remain an owner).
- Review and enter the Acquired (date of purchase).
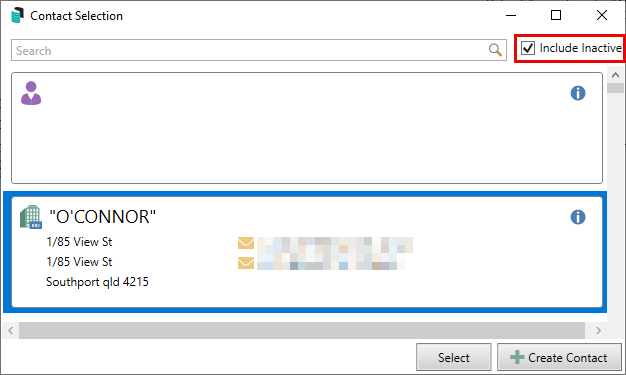
- Click Select Contact to select an existing contact, use the Search field if necessary to locate the Contact by name, address, or the ABN or ACN can also be searched, to show inactive Contacts > Select Contact > Include Inactive > Select, or Create Contact to create a new contact. For more than one owner, repeat the Select Contact or Create Contact to add each one.
- If entering a Postal Address, the automatic address lookup will automatically suggest and auto-populate an address for you.
- Only Australian postal addresses are looked up. Overseas addresses can be typed in manually.
- The address will be auto-populated in title case for the first line, and the Suburb and State will be in upper case.
- Once the address has been selected, if the second line containing the Suburb, State, and Postcode exceeds 30 characters, it will be split between Suburb and State.
- Addresses prefixed with ‘ATT’ will be ignored.
- Review the contact preferences set and select appropriately. If an email address is to be included, it can be configured for a specific purpose. Enter the email address and ensure the selection is set for the desired purpose.
- 'Work Orders', 'Utility Billing', and 'Remittance Advice' are not owner contact preferences that can be specifically set.
- 'Work Orders', 'Utility Billing', and 'Remittance Advice' are not owner contact preferences that can be specifically set.
- Click Finish.
- If any report sets (welcome packs) are configured for distribution, they will appear in the Report Distribution window, with the new owner pre-tagged. Click Proceed to send these reports to the Owner.
- If there are other types of contacts to be added to the lot, use the Add button and select the contact type.


QRG Change of Details
- Search or select Roll. In the Account Code List, select the relevant lot and click OK.
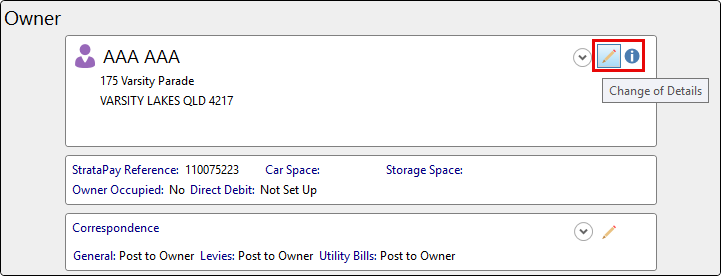
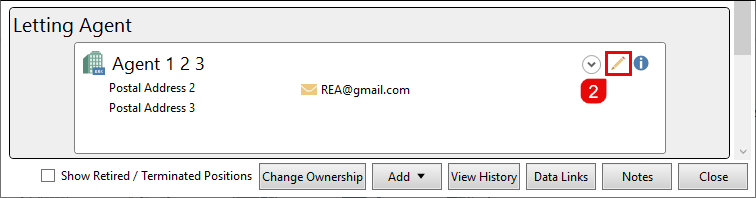
- Within the required contact area: Owner, Real Estate Agent, Tenant etc., click the pencil icon to edit the contact information.
- The date of receipt of the notice will populate with the current date and time. Amend the contact information as needed or update the contact preferences.
- If entering a Postal Address, the automatic address lookup will automatically suggest and auto-populate an address for you.
- Only Australian postal addresses are looked up. Overseas addresses can be typed in manually.
- The address will be auto-populated in title case for the first line, and the Suburb and State will be in upper case.
- Once the address has been selected, if the second line containing the Suburb, State, and Postcode exceeds 30 characters, it will be split between Suburb and State.
- If an email address is to be included, it can be configured for a specific purpose. Enter the email address and ensure the selection is set for the desired purpose.
- Click Save.
- If any report sets are configured for distribution, they will be available in the Report Distribution window, with the change of detail owner pre-tagged. Click Proceed to send these reports to the owner.
Change of Ownership
This section covers the methods for transferring ownership of a lot. A contact is associated with records throughout the system. The same contact can be added to different areas, such as the Roll and Office Bearers, and multiple contacts can be linked to a single lot. If the same Owner contact exists in instances where different address or email information is required, a separate contact will be required for each.
When changing ownership, if any other contacts are associated with the lot account, there will be prompts to keep or remove this information.
If any automated reports are set to distribute based on changes in detail or ownership, they will also be included.
This Change of Ownership process is also applicable for when another person purchases a share in a lot, and they need to be added to the lot as another owner. This is so that the ownership timeline is recorded for the lot.

Change of Ownership | Create Contact
- Search or select Roll. In the Account Code List, select the relevant lot and click OK.
- In the Roll screen, click the Change Ownership button.
- If there is more than one Contact on the lot, you will be prompted to select if this is:
- Normal change of ownership.
- Deceased / Divorce (this will keep the existing StrataPay number and requires at least 1 of the existing Contacts to remain an owner).
- Review the Acquired date and enter. If a car or storage space is associated, enter this information, and if known, select Is Owner Occupied. Notes can be entered if needed.
- Click the Create Contact button, and the Contact Details window will appear.
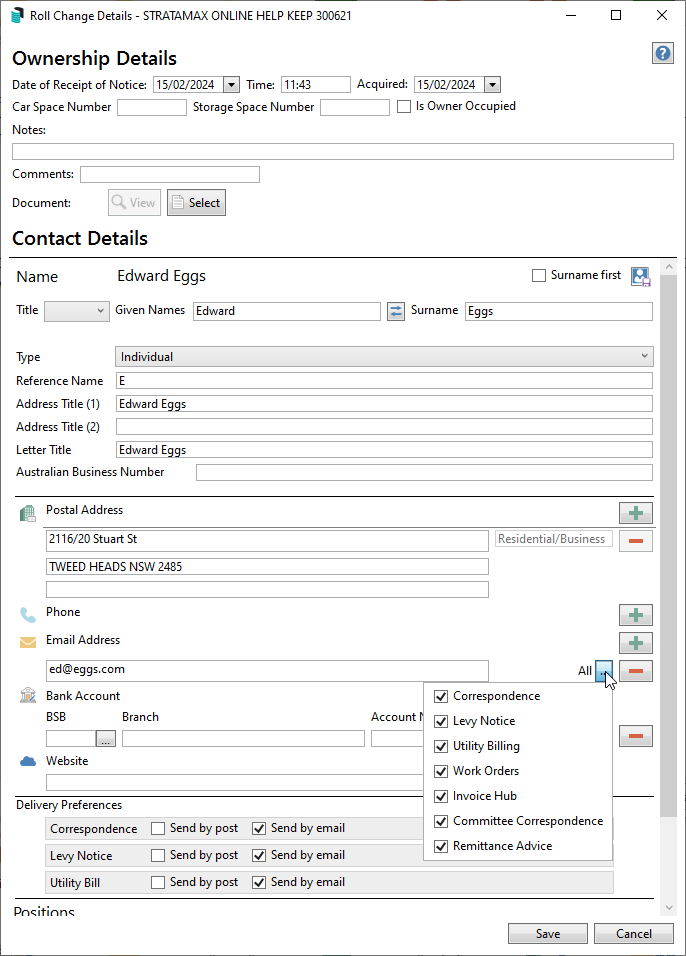
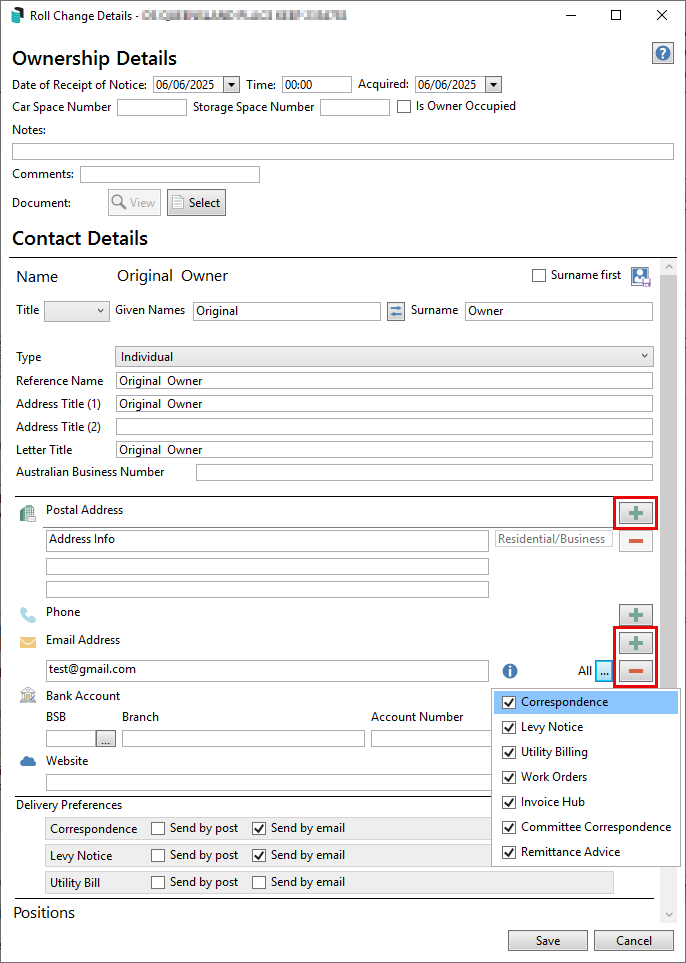
- The Reference Name, Address Title (1), and (2) (based on character length) fields will update automatically after entering the Title, Given Names and Surname (red outlines indicate this).
- Tick the Surname first box to display the surname first in Name and other fields.
- Use the 'switch' button (two blue arrows) to swap the contents of the Given Names and Surname fields.
- Enter the full owners' names into the Name field and then abbreviate with Address Title 1 & 2. Validation exists on Address Title 1 & 2 fields,s so if this matches the full Name, Address Title 2 should be abbreviated.
- Change the Type to either 'Individual' or 'Company.'
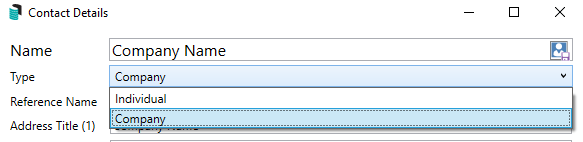
- If a 'Company' was selected, you can enter an ABN and/or ACN if required. Both fields are validated.
- Click the green plus button to add the Postal Address, Phone Number, and Email Address.
- This can be assigned to its specific purpose when entering an email address. For example, use a specific email address for Levies, Correspondence, or Invoice Hub. A separate email can be recorded for each type if needed. If all details should be sent to one email address, this should not be changed.
- Additional phone numbers and email addresses can be added by clicking the green plus button.
- To delete them, click the red minus button.
- A notification icon will appear if a duplicate email address is found in another contact.
- When entering a Postal Address, the automatic address lookup will automatically suggest and auto-populate an address for you.
- Only Australian postal addresses are looked up. Overseas addresses can be typed in manually.
- The address will be auto-populated in title case for the first line, and the Suburb and State will be in upper case. Once an address is selected, it will populate in the address fields, which can then be edited as required.
- NOTE: Due to the limited number of characters (30) available on each line, the Suburb will be populated to line 2, with the State and Postcode on line 3
- If an email address is entered, the delivery preferences can be set for post or email, where required.
- Correspondence refers to Merge Letters and Meeting Hub documentation.
- Levy Notice - this refers to Levy Notices, Arrears Notices, and Invoice Printing.
- Utility Bill - If a sub-group is associated with the contact, this field can be set to include the Utility Billing preference. If this is not linked to the Main Group, the contact preference can be set for each Debtor Maintenance record.
- The contact's Bank Account details can be added here as well. This will enable refunds and reimbursements if required.
- Click the Save button to add the contact.
- If additional contacts exist, click Create Contact and add the information noted above. If multiple contacts exist on the lot account, review the combined ownership information (Combined Owner) Name and adjust to office standards as needed.
- Click Finish to close the Roll Change of Ownership screen.
- If any report sets are configured for distribution, they will appear in the Report Distribution window, with the new owner pre-tagged. Click Proceed to send these reports to the Owner.

Change of Ownership | Select Contact
- Search or select Roll. In the Account Code List, select the relevant lot and click OK.
- In the Roll screen, click the Change Ownership button.
- If there is more than one Contact on the lot, you will be prompted to select if this is:
- Normal change of ownership.
- Deceased / Divorce (this will keep the existing StrataPay number and requires at least 1 of the existing Contacts to remain an owner).
- Review and enter the Acquired (date of purchase) and Date of Receipt of Notice (date of when the change was applied). If a car or storage space is associated, enter this information, and if known, select Is Owner Occupied.
- Click Select Contact to select an existing contact, use the Search field if necessary to locate the Contact by name, address, or the ABN or ACN can also be searched, to show inactive Contacts > Select Contact > Include Inactive > Select, or Create Contact to create a new contact. For more than one owner, repeat the Select Contact or Create Contact to add each one.
- Click Finish.
- If there are additional contacts to be added to the lot, click Select Contact to select an existing one or Create Contact to create a new one.
- If any report sets are configured for distribution, they will appear in the Report Distribution window, with the new owner pre-tagged. Click Proceed to send these reports to the Owner.
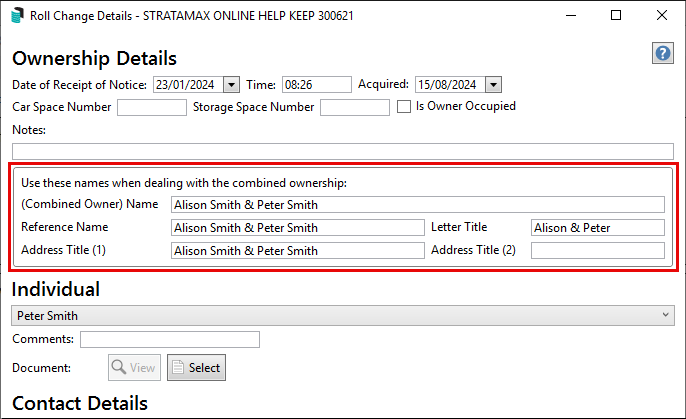
Combined Owner Name
If there are multiple Contacts attached to a lot in the Roll, a (Combined Owner) Name, Reference Name, Address Title (1), Address Title (2), and Letter Title will be created. These fields can be adjusted to suit office formatting when completing a Change of Ownership or a Change of Details in the Roll.
- Search or select Roll. In the Account Code List, select the relevant lot and click OK.
- In the Roll screen, click the pencil icon next to the owner to complete a Change of Details to access the (Combined Owner) Name and combined ownership information, or adjust the combined ownership information at the Change of Ownership stage when selecting the Change Ownership button following the Change of Ownership process.


Change of Ownership | Deceased/Divorce
There is an option to keep some of the original owners due to a Deceased/Divorced ownership change. If there are two or more Contacts on a lot and a Change of Ownership is completed, you will be prompted to select which Contact to retain, which will also keep the StrataPay Reference Number.
- Search or select Roll. In the Account Code List, select the relevant lot and click OK.
- In the Roll screen, click the Change Ownership button.
- If there is more than one Contact on the lot, you will be prompted if this is a:
- Normal change of ownership.
- Deceased/Divorce (this will keep the existing StrataPay number, and requires at least 1 of the existing members to remain an owner).
- Review the Acquired date and enter. If there is a car or storage space associated, enter this information, and if known, select Is Owner Occupied.
- Click Select Contact, then select the original owner whose Contact should remain with the lot.
- Review information and click Finish.
- Print any Roll Distribution reports and Close.
- The Roll record will be updated with the selected Contact, and the StrataPay References will remain unchanged.

Change of Details
If changes are needed to an existing contact associated with a lot, complete the following. If this is the method used for editing the contact, there will be no prompt or warning to confirm where else this record may be used or updated.
- Search or select Roll. In the Account Code List, select the relevant lot and click OK.
- Within the relevant area, there are two ways of updating the contact:
- Click the pencil icon to edit the contact information. This method will include the date of notice receipt and allow documents to be included in the change of detail.
- Click the blue 'i' icon to view and edit the contact information without the date of receipt of notice or document inclusion. This option will also not include the Owner Reports for automated distribution.
- If you clicked the blue 'i' icon, you will need to click the Edit button at the bottom of the screen, and then edit the contact card with the additional information, using the green 'plus' buttons to add further additional fields where needed, or the red 'minus' button to remove unwanted fields. If editing using the pencil icon, complete the Date of Receipt of Notice field and select any document attachment if needed.
- If entering a Postal Address, the automatic address lookup will automatically suggest and auto-populate an address for you.
- Only Australian postal addresses are looked up. Overseas addresses can be typed in manually.
- The address will be auto-populated in title case for the first line, and the Suburb and State will be in upper case. Once an address is selected, it will populate in the address fields, which can then be edited as required.
- Each address line is limited to 30 characters, and the system will automatically format the address, moving the Suburb to the 2nd line, and the State and Postcode to the 3rd line.
- Click Save to update the contact card.
- If any report sets are configured for distribution, these will be available in the Report Distribution window, with the change of detail owner pre-tagged. Click Proceed to send these reports to the Owner.


Edit Contact Preferences
With each contact associated with a lot, the contact preferences can be adjusted with the following steps.
- Search or select Roll. In the Account Code List, select the relevant lot and click OK.
- Within the Edit Correspondence Preference area, tag the required contacts to receive the correspondence or levy notice. Click Save.

This area controls what is being sent for a lot account. Using these boxes will assist in managing those who wish to receive something on behalf of a lot, and allows for contact preferences to be set at the contact level.
A greyed out box indicates there are no preferences set for that contact:

Roll | Split Contacts
In some instances, in the Roll screen when an owner contact card contains two individuals (such a husband and wife), a small icon representing two people will be displayed. This is for splitting said contact into two separate individuals so that they can each have their own separate contact details, preferences, and so that accurate reporting can be done. It is also required if one of the individuals is a committee member and needs to be added to the Office Bearers screen.
See Split Combined Owners for more information.

Adding Other Contact Cards to a Lot
This section covers how to add another contact type to a lot. The other types can be Entitled Person, Nominee, Proxy, Power of Attorney, Tenant, Real Estate Agent, and Other Person, but the options available will vary based on the building's state.
To add another owner to the lot, please follow the Change Of Ownership process.
- Search or select Roll. In the Account Code List, select the relevant lot and click OK.
- Click Add and select the type of contact required.
- Complete the required fields for the selected contact type, and if there is a document to attach, click Select and add it from the DocMax window.
- Click Select Contact to select an existing contact, to show inactive Contacts > Select Contact > Include Inactive > Select, or Create Contact to create a new contact.
- If adding a 'Nominee' to a Lot, select the Nominee for in the drop down, check the Ranking field and also the Nominee Type. (0 is set automatically, so update to 1 onwards as required).
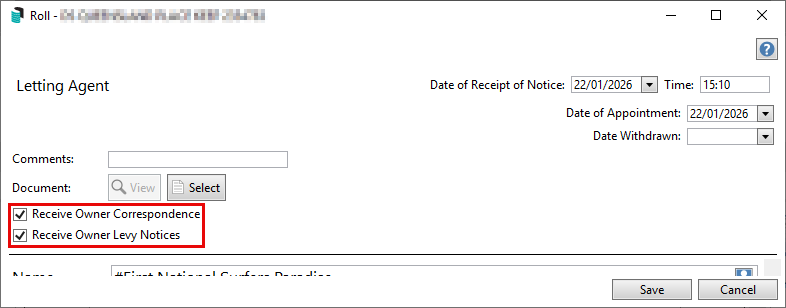
- If this person is to receive any documents, reports or notices, select Receive Owner Correspondence and or Receive Owner Levy Notices to include this agent to receive each respective communication type. These are the only two types that can be set to receive owner communication.
- Click Save to add the contact to the selected lot account.
- Select Confirm if a message appears confirming that this contact card holds multiple positions.

Editing other Contact Card
If an edit is required to an existing contact card that is associated with the lot, follow these instructions. If this contact is associated with additional lots and the change required is extensive, creating a new contact would be recommended instead of updating the existing contact. For example, different emails or residential address.
- Search or select Roll. In the Account Code List, select the relevant lot and click OK.
- Click the pencil icon to update the information as needed.
- Click Save to save the edited information.
Removing Other Contact Card from a lot
If the contact is no longer associated with the lot account, it can be retired, withdrawn, or terminated, depending on the contact type.
Once the termination/withdrawal/retirement date has been entered, you can still review and edit the contact's details by clicking the 'Show Retired / Terminated Positions' box in the bottom left of the Roll screen.
- Search or select Roll. In the Account Code List, select the required lot and click OK.
- In the relevant contact type, click the pencil icon.
- In the top right of the contact screen, select the Date of Retirement / Date of Termination / Date Withdrawn (based on the contact type).
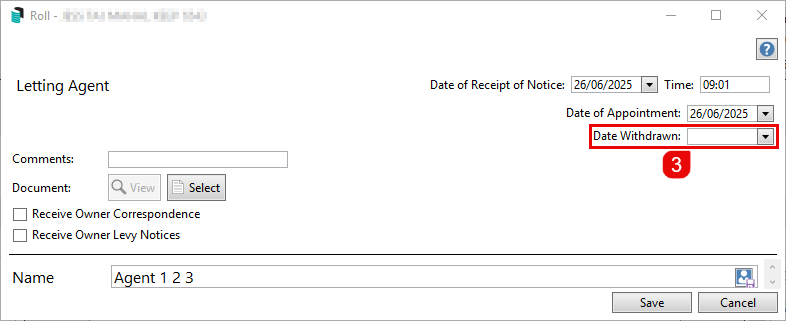
- Click Save.


Changing Ownership with other contact cards included
If there are any other contact cards on the lot account, excluding the Owner, this record must be reviewed before the current change of ownership can be applied. The instructions below refer to a Real Estate Agent included on the Lot prior to the change of ownership, and similar screens will be included for Tenant, Agent, and Mortgagee Types.
- Search or select Roll. In the Account Code List, select the relevant lot and click OK.
- In the Roll screen, click the Change Ownership button.
- Refer to the existing contact information and tick Keep Letting Agents (or whichever type is relevant).
- Click Next to begin the change of ownership process.

Change Ownership and the StrataMax Portal
With a change of ownership, access to the StrataMax Portal will be disabled for the owners who have sold the lot. The new owners can create a portal account or add the new lot to their existing portal account. Instructions for owners on managing their portal account are available here.
If the owner selling the lot is an Office Bearer, the change of ownership will prompt the user to resign the Office Bearer record. If the owner owns multiple lots and the lot being sold is set up as the Office Bearer record (Office Bearer Owner of Lot field), but the owner remains as an office bearer, it is recommended to change the Owner of Lot field to a lot they still own. That lot will then have Committee Report access on the portal.
View History
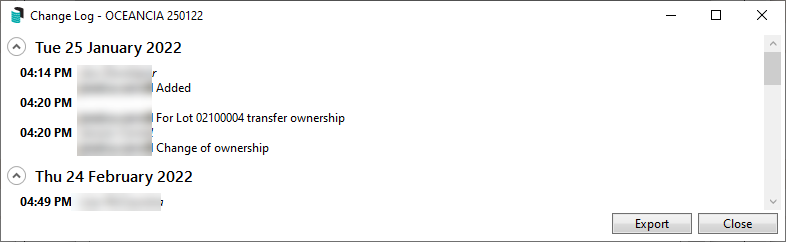
With each change of ownership or detail applied to a lot account, a history entry is created. This can be viewed and is available since the creation of the lot account. The first screen provides a single-line summary of the change included. For a more detailed log, including timestamp, date, and user information, use the Change Log button.
To review more detailed changes made to the Roll across the entire building, or even multiple buildings, you can use the Log Viewer. The Category needed to see changes in the Roll is called 'ROLLED.LOG'.

- Search or select Roll. In the Account Code List, select the relevant lot and click OK.
- Click View History to view the ownership history, including changes of ownership and changes of details.
- Change Log: Will provide detailed change log information with a timestamp, date stamp, and user entry. This can be exported to Excel.
- Delete (if user has permission): Allows the current ownership to be removed from the selected lot account.
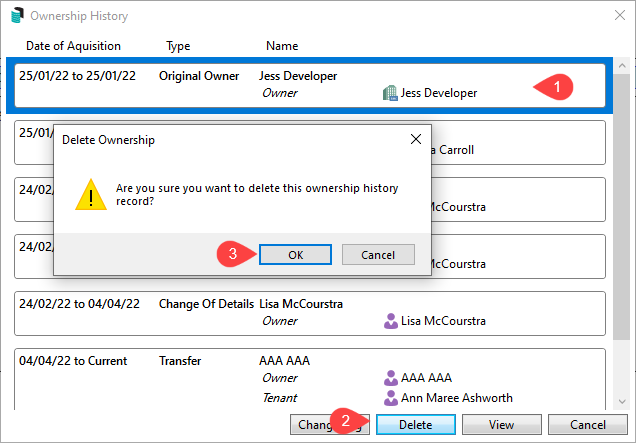
- View: Select a past history record, then click View to display this information.
- Cancel: This will close the View History area.
- Change Log: Will provide detailed change log information with a timestamp, date stamp, and user entry. This can be exported to Excel.


Notes
Notes on a lot account can be recorded for lot-specific information, and certain system processes automatically record notes. For example, Arrears and Certificates issued. This area can be used for reporting and is available via Reports / Utilities (Global ). For more information about Notes throughout StrataMax, see the Notes article.
- Search or select Roll. In the Account Code List, select the relevant lot and click OK.
- Click the Notes button at the bottom of the screen.

- In the 'Notes' window, click the Add button and then select a category (this will assist with reporting).
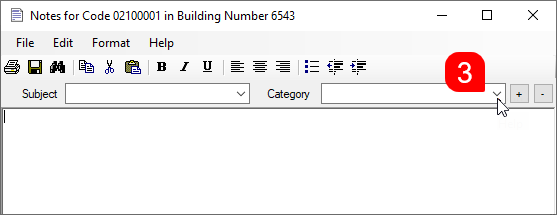
- Either type or copy and paste the note information, and click the Save icon.
- Click Close to close the notes window.


Notes can be edited by highlighting the relevant note and clicking Edit Notes.
Roll Fields explained with Levy Notice Address
The following outlines what will be displayed with the Roll Fields when applied to a levy notice, and what is recommended when using the Name, Reference Name, and the Address Title (1) and (2) fields. The Address Title (2) field should be included when Address Title (1) exceeds the 30-character limit. The Letter Title field can be used in areas like Merge Letters and Roll Details Confirmation.
Name Field: The full name of the contact should be entered here.
Reference Name: This field is limited to 30 characters and contains an abbreviated name. This field is displayed when selecting the Roll record list and is used when selecting from other various lists in StrataMax.
Address Title (1): Includes the first portion of the Name within the 30-character limit.
Address Title (2): Contains the remainder of the Name that did not fit in Address Title (1), or nothing if the name is less than 30 characters.
In the example where independent content is required, for example, a C/-Person, this should be considered to include either Address Title 1 or the Residential / Business address detail as per the example below.

Levy Notice

Roll Document List
The Roll Document List includes all documents sent using Levy Distribution or Report Distribution/Merge Letters. You can preview, print or email copies and multiple can be selected.
- Search and select Roll.
- Select the document icon to open the Roll Document List screen.
- This lists all documents sent from various areas in StrataMax, predominantly using the Report Distribution screen. From within this window, multiple documents can be selected and then emailed or printed by right-clicking them and selecting accordingly.

Roll | Ledger Card
There is a shortcut in the Roll to open the Ledger Card in Report Distribution.
- Search and select Roll.
- Select the lot account and click Ok.
- Click the blue 'i' icon to open the Ledger Card preview.
- Click Ledger CardReport to open Report Distribution and produce the Ledger Card.
- Click Ledger Card List to open the Ledger Card display in a table grid format.

