 | The instructions in this article relate to Debtor Maintenance contacts. The icon may be located on your StrataMax Desktop or found using the StrataMax Search via the Sub-Group. |
When a Sub-Group is created, based on what was selected for the lot emulation area, the system automatically links the Roll records with the Debtor Maintenance record in the Sub-Group. Where the contact is not an owner occupier, this will be managed via the Debtor Maintenance record and for records that are owner occupied, these will remain linked and maintained via the Roll.
If the Sub-Group is the only management requirement for utility billing purposes, these can have the Roll and Debtor Maintenance records unlinked, and the steps to remove all links are below.
Add Debtor Maintenance Contact
Adding Debtor Maintenance records would be an option to complete if, based on the New Sub-Group setup, the lot emulation was set to Emulate Selected Lots or No Lot Emulation. These instructions will allow a new debtor to be added to the Sub-Group.
- From the Sub-Group building, search or select Debtor Maintenance.
- Click Add New. Click Create / Select Contact.
- Search for the contact using the search bar. If there is no contact available, click Create Contact.
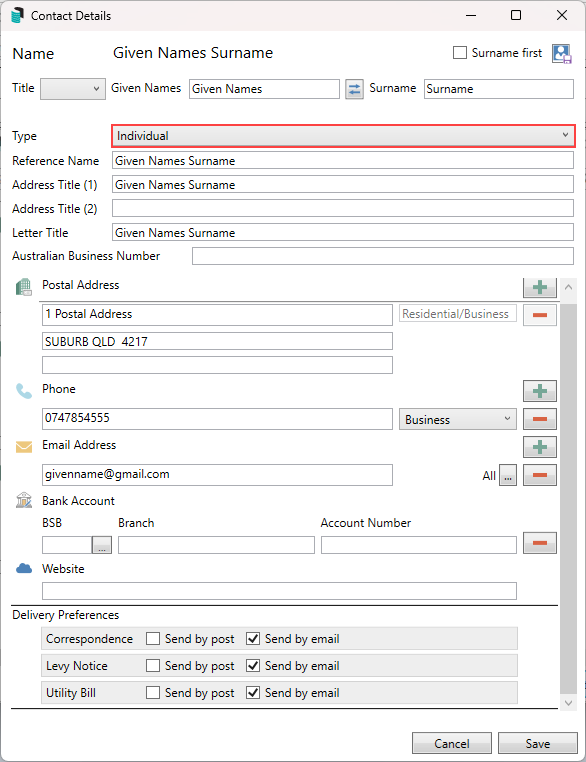
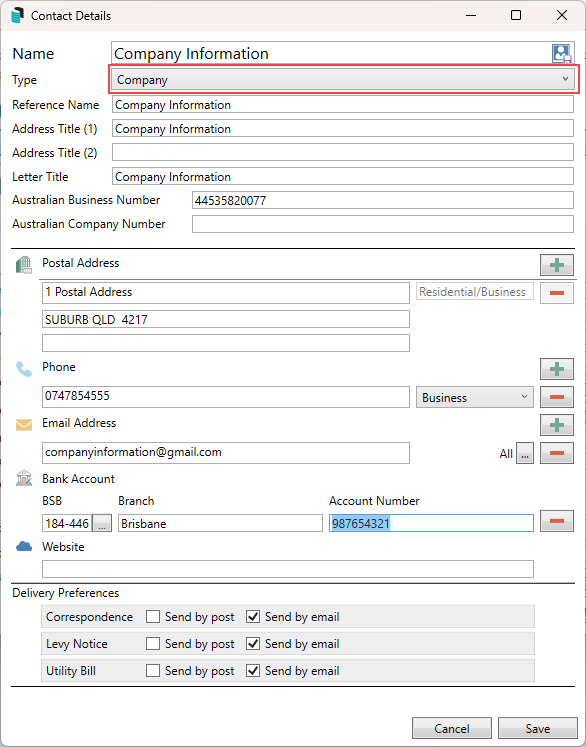
- Complete the field information, changing the type to select the correct record type.
- Individual Type will contain information like this:
- The company will contain information like this.
- Individual Type will contain information like this:
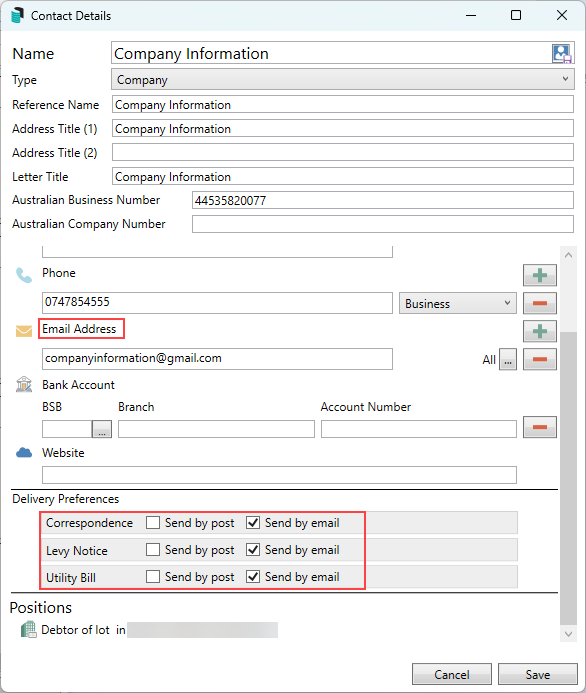
- If there is an email address, set the delivery preference for the contact and click Save.
- Additional fields from the Debtor Maintenance window will be available to complete where required.
NOTE: The Direct Debit field will auto-populate based on the Owner's direct debit status.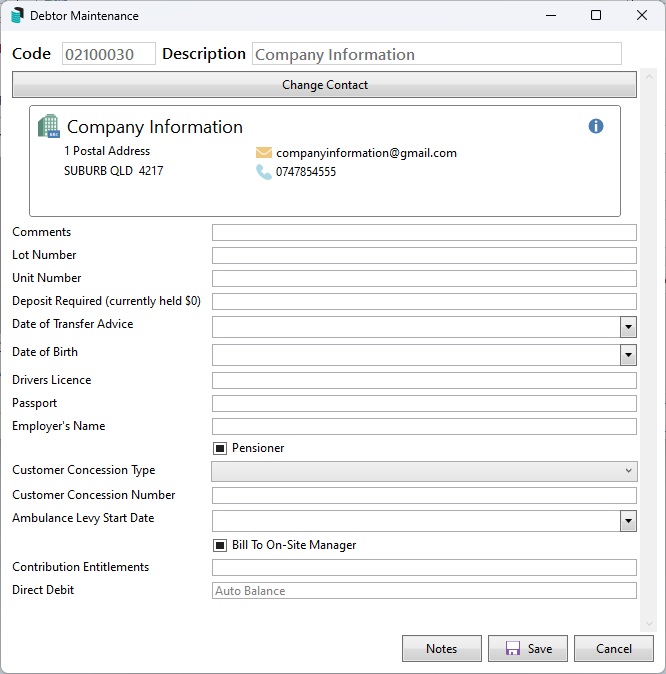
- Click Save once the contact and field information has been completed.


Update Debtor Maintenance record (unlinked)
The instructions below will be used when updating debtor maintenance records that are not linked to the main in the Roll. To update Debtor Maintenance records that are linked to the Roll, this is done via the Main with a change of detail.
- From the Sub-Group building, search or select Debtor Maintenance.
- Select or search for the appropriate debtor from the list of existing debtors.
- Use the blue i icon and Edit to edit the contact information. If an email address is added, ensure the contact preferences are reviewed and set as needed.
- If the name requires a change, this is subjected to no more than 30% of the original record. If this is the scenario for change, consider a change of ownership.
- If the name requires a change, this is subjected to no more than 30% of the original record. If this is the scenario for change, consider a change of ownership.
- Click Save once the data field(s) have been updated.

Remove Data Link
Removing a single data link between the Main and Sub-Group will allow both areas to be managed independently. If a pre-existing data link is applied to a lot, ensure that this is the intended action before removing any data link, as it will mean managing the Main, Roll and Sub-Group, and Debtor Maintenance areas separately.
- From the Sub-Group building, search or select Debtor Maintenance.
- Select the blue link icon in the top right of the record from the contacts list.
- This will preview the Data Links window for the selected account. Select the E record and click the red cross icon.
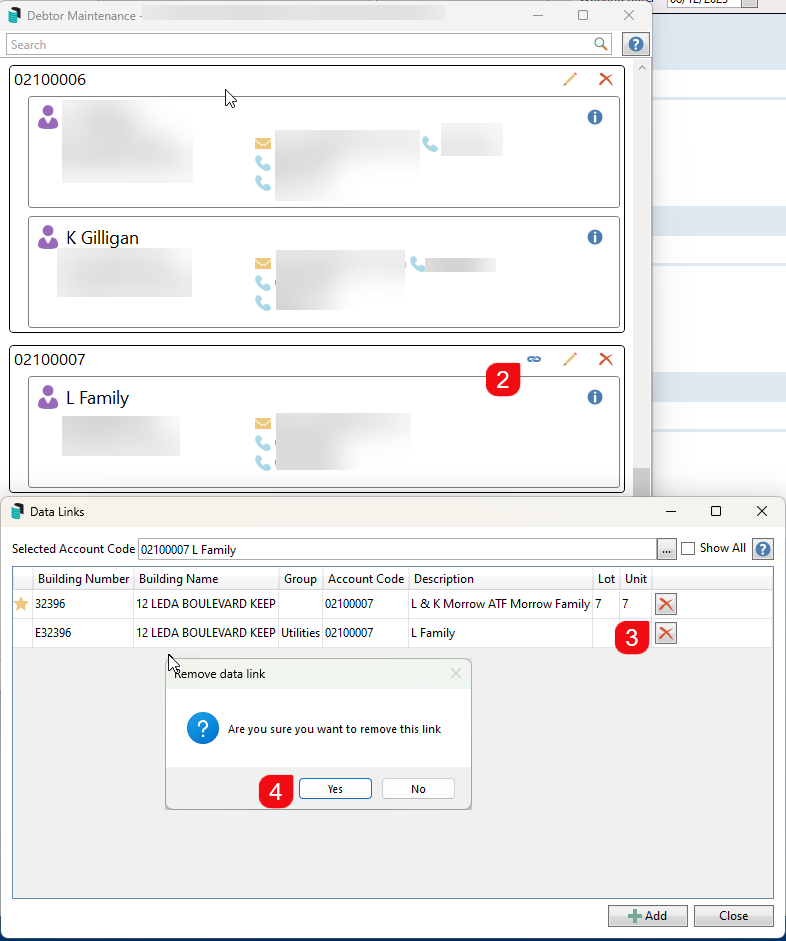
- Tick 'Show All' to see all data links, and if required, delete any further data links.

Email/Print Settings
If there are multiple contacts for a Debtor account, utility bills & arrears will only be printed to post to the first contact's address; however, multiple contacts can receive the bills via email if required.
The below area explains the settings available via the Conditions area in the Print Bills tab. Please note that the table of debtors from this window will display the owner emails only, and not correctly reflect any data-linked records that may contain an agent or other type of record configured to receive the bill.
- Print Only - A hard copy of the bill will be printed to the printer assigned in the Print Bills tab. If split contacts are set for post using different addresses, a combined reference name will be included, and the first contact address will be used.
- Email where email address provided - This setting will deliver a copy of the bill if an email address is available and will not honour contact preferences.
- Email / Print as per contact preferences - This is the recommended setting and will ensure that the bills are delivered to each debtor based on the configured setup.
Bills to Agent, Mortgagee or Other
Bills to other contact types on the Roll should allow for the utility bill to be sent to this nominated type, and the below outlines the setup at Main level and how this will deliver the bill.
Please note that there are scenarios if the Agent or Other contact is to receive the Utility Bill only; this facility will need to be managed independently. Options include recording the Agent or Other contact into the Roll Owner record or unlinking the data link between the Main and Sub-Group and updating each area for contact information. This area will be reviewed with preferences on how this is treated in a future project.
- The agent set to receive the correspondence, levies and utility bill example:

- The agent set to receive levies and utility bill example:

- Agent to receive correspondence and utility bill examples. This will require the Owner area to include the Levy Notice address field with an address. This allows the Owner preference to take precedence when sending the Levies, and the Agent can receive the Correspondence and Utility Bill.

- Split contacts using separate addresses

Bills to the Building Manager
There is a facility to send the Utility Bills to the Building Manager, including the information displayed on the bill for Debtor(s) Full Name with a C/- Building Manager (address). This address for the manager is populated based on the Office Bearers position of the Building Manager, and will be delivered based on the Office Bearers contact preferences.
This area is designed for bills only, and the Owner will issue arrears based on their contact preferences.
- Select the Sub-Group and search or select Utility Billing.
- Click Options and Bills to Building Manager.
- Click Building Manager Details to ensure that the position of Building Manager has been made available in the Office Bearers. If this record does not exist, Add Officer and either create or select contact, ensuring the the Office type is set to Building Manager.
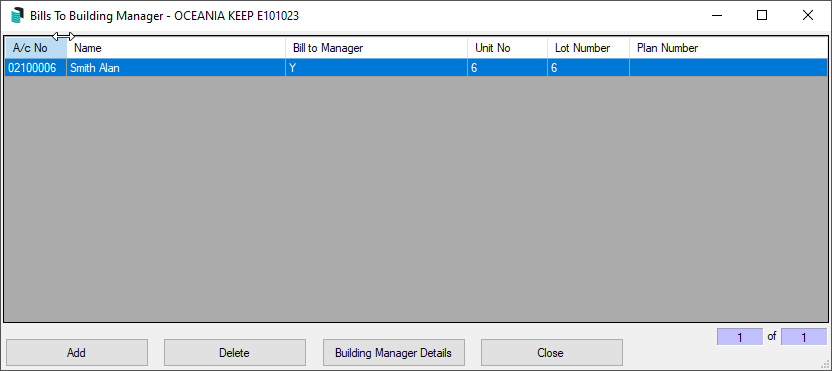
- Click Add to select from the debtor list which ones to add for the building manager to receive.
- To remove an existing debtor, highlight the record and click Delete.
- To update / check the building manager's contact information, click Building Manager Details.
- Click Close.

