 | The instructions in this article relate to Management Fees Setup. The icon may be located on your StrataMax Desktop or found using the StrataMax Search. |
Management Fees Setup function is for managing fixed fee arrangements. If a building's management fees, disbursements, or any other regular charges have been agreed to in the Management Agreement, then they can be entered in Management Fees Setup in StrataMax to automate the invoicing of these items during the management fee process.
Management Fees Report can be used to report Management Fees based on specific fields.
Be sure to check out the Management Fees & Disbursements video on our video page as well.
Management Fees Setup
For StrataMax to automate the invoicing of management fees and recoveries, the management fees need to be added to Management Fees Setup. However, before doing that, the building must be imported as a debtor into GLMax via Import Buildings as Debtors. Then the invoice codes need to be created in Edit Invoice List and then linked to an income code in GLMax. And finally, then linking the GLMax income code to the StrataMax expense code in the building in the Invoice Link Manager.
The timing of the management fee process needs to be considered - whether the management fees are charged in advanced or in arrears. It is recommended that this is done as part of the End of Month process for convenience, either directly before or after running Month End Rollover. Process Management Fees can also be configured to process automatically, using the Auto-Process Management Fees setting, based on the Next Invoice Date.

It is recommended to restrict permissions in Security Setup for the appropriate users and user groups to ensure management fees are not set up or changed incorrectly; the permission is 'Make Changes to Management Fees'. The permission 'View Management Fees' allows users to view fees that have been set up, but not add, edit, delete, or process a bulk edit amount.
If you need to move a building between GLMax companies, follow these instructions to ensure management fees are correctly ended in the original company and set up in the new one.
Adding Management Fees for a Building
Before proceeding with the below steps, the building must be imported as a debtor into GLMax via Import Buildings as Debtors. Then the invoice codes need to be created in Edit Invoice List and then linked to an income code in GLMax. And finally, then linking the GLMax income code to the StrataMax expense code in the building in the Invoice Link Manager.
- Search or select Management Fees Setup.
- To attach the building’s management agreement, click the Select Document button in the top right, then locate it in DocMax, and click the Select Document button in the DocMax ribbon at the top. This will apply a Category of 'Management Fee Contracts' (this is a system Category and cannot be deleted from DocMax). To remove the document, select Properties and remove the category, then select Save and Close.
- If Management Fee Templates have been previously saved...
- Clicking the Load from Template button, selecting the template, and click OK.
- Edit each fee by clicking the Edit button for each (go to step 5.).
- Click the Add Fee button.
- Select the Invoice Code drop-down to choose an item to charge.
- The Building Expense A/C will automatically populate, but the expense can be changed if required.
- Select the Frequency.
- Enter the Amount (inclusive of GST); if entering the amount based on per period figure select per period or if entering based on the annual amount select Annual.
- Tick the Charge per lot box if this amount is to be charged per lot.
- the Annual Amount will automatically calculate based on the Period Amount and the number of Active Lots.
- Enter the Effective Dates fields; Start and Next Charge, which can be the same if required.
- This validation does not affect management fee processing, only the timing for when the next charge occurs.
- A Termination Date can be entered; when entered the screen will indicate the number of charges remaining. When the final invoice is created via Process Management Fees the Management Fee item will be marked Inactive. A Termination Date would be the end of the management agreement, and although the field is not mandatory, this date is used for the Dashboard item ‘Management Fee Expiry’.
- A Termination Date will not automatically create a pro rata for the final charge; this must be manually created if necessary.
- Select the Auto Increase drop-down if required and choose the required option:
- No Auto Increase will result in no increase.
- Highest Of CPI OR Percent will allow the system to apply whichever percentage is higher, either what is set in the Process Mgmt Fees menu in GLMax, in Config (See Process Mgmt Fee Configuration for more info), or what you type into the Fixed Percentage box.
- CPI will use the percent figure that has been set in the Process Mgmt Fees menu in GLMax, in the Config. See Process Mgmt Fee Configuration for more info. The CPI rate should be reviewed and adjusted as CPI rates are released. This is completed in Process Management Fees in GLMax. Timing for updates are especially important if you are also using Auto-Process Management Fees.
- Percent will display a Fixed Percentage box for you to type in the required figure.
- Enter the Next Increase date.
- Tick the Pro-rata increase box if the next time the fee is charged, the increase fee should be calculated on a daily basis.
- Remove the tick from the Active box if the fee should not be charged; this may be used during initial building setup.
- Click the Save button.
Ensure the increase date is accurate. In the example below the management fee will increase on the invoice for 1st of January 2026. Prior to this, 12 months of the original set management fee would have charged if charging monthly or 4 quarters if charging quarterly.
If there was no pro-rata required but the management fees were to increase from the 1st of January invoice, enter the next increase as 1st of January.


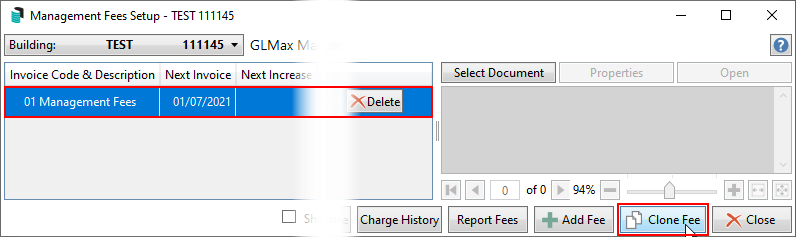
Clone Fee
When this button is clicked, the system will clone the following information from the selected fee:
- Frequency
- Start Date
- Next Charge Date
- Termination date (if there is one in original setup being selected)

- Search or select Management Fees Setup.
- Select the existing fee you would like to copy/clone, then click the Clone Fee button.
- Populate the reset of the details required (as per instructions above) then click Save.

Save as Template & Load from Template
Templates can be used if management fees are charged in a consistent way across buildings. This helps save time setting up what is to be charged for, but amounts and dates can still be edited.
Once management fees have been set up, the template can be saved that will include all information entered into Management Fees Setup; when using the Load from Template button, all fields can be edited as required. The Load from Template button is only visible if there are no existing management fees set up already in the selected building and when used additional fees can be entered if required.
Save as Template
- Enter all the management fees as required.
- Click on Save as Template.
- Enter a name for the template; the name is stored in the list of templates.
- Click Save.
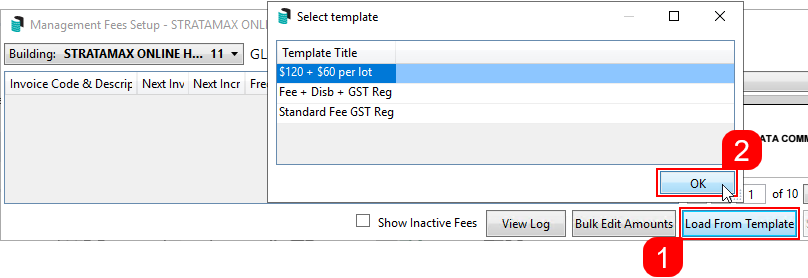
Load from Template
- Click the Load from Template button.
- Select the required template and click OK; this will enter all the management fees included in that template.
- Edit each management fee entry as required.

The Load from Template button is only visible if there are no existing management fees set up already in the selected building.
Edit Management Fees
Management fees can be edited, except however if fees have previously been charged (in Process Management Fees). In which case the Next Charge date cannot be edited and you will first need to remove the tick from the Active box and then Save, and then set up a new fee; this ensures a clear audit log is available in the View Log screen.
- Search or select Management Fees Setup.
- Click the Edit button next to the required fee.
- Edit the required fields.
- Click on Save.
Delete Management Fees
Management fees can be deleted, but only if fees have not been previously been charged (in Process Management Fees); if a charged fee should no longer be charged, it is recommended to set the fee as Not Active.
- Search or select Management Fees Setup.
- Click the Delete button next to the required fee.
Set a Fee to Not Active
Fees that should no longer be charged must have the tick in the Active box removed. To view Inactive Active fees in the Management Fee Setup menu, tick the Show Inactive Fees box.
- Search or select Management Fees Setup.
- Click the Edit button next to the required fee
- Remove the tick from the Active box.
- Click Save.
Management Fees that are entered with a Termination Date will automatically be marked Inactive when the final fee is processed. Inactive Fees can be marked Active again if required by ticking Show Inactive Fees and editing the required Management Fee item and ticking Active.
View Log
To review changes made in Management Fee Setup, click the View Log button. This will show when fees were added, edited and deleted.
Bulk Edit Amounts
The Bulk Edit Amounts button is used to edit fee amounts across selected buildings, based on finding the Invoice Code and Frequency. To update fee amounts across selected buildings follow the below steps:
- Search or select Management Fees Setup.
- Click the Bulk Edit Amounts button.
- Select the Invoice Code to edit.
- Select the Frequency.
- Select whether the amount is being changed based on Set Periodic Amount or Increase Periodic Amount By Percent.
- Enter the Amount or Percentage.
- Tick the Reverse charges from box and enter the required date if the amount should have been updated in the past. If this is ticked, previous charges will be reversed and reprocessed at the updated amount in the current financial year.
- Click the Proceed button.
- Tag the required buildings (the building list will display only buildings that match the Invoice Code & Frequency); the list will display Original and Updated periodic amounts.
- Click OK.
- Once processed a message will confirm the number of updated records. The Charge History will show Reversed invoices.

Charge History
Historical charges can be displayed in Charge History including StrataMax and GLMax Transaction References. Any reversals will be displayed and the Status will be 'Cancelled.'

Report Fees
To report the management fees setup in the selected building click the Report Fees button. The report will include Active & Non Active fees, however, Non Active fees will show a Next Invoice Amount of $0.
To report management fees setup in multiple buildings and include particular fields use the Management Fees Report.
