 |
The instructions in this article relate to Label Printing (Debtors), (Creditors), (Mortgagee). The icon may be located on your StrataMax Desktop or found using the StrataMax Search. |
While the Label Printing icons are still available, Labels can be produced in Report Distribution, with instructions available below. This provides a simpler way to produce labels while still supporting the same core functionality as the legacy label printing option, including starting from a selected label position, generating email-only lists, exporting recipient details, and supporting contact-based output.
If the BING API Printer is in use, there is no need to include labels with address merge fields, as it uses the recipient data from Report Distribution exactly as displayed on screen. This is confirmed on the Preview screen, prior to distributing.
Print labels from Report Distribution
Report Distribution includes additional label printing options to give you more control over how labels are produced. You can set the title to display as The Resident, remove duplicates, choose the starting label position, and export the address and email lists.
When using the BING API Printer, recipient address details from Report Distribution are included exactly as shown on screen. Review the Preview screen before distributing the labels.
For labels printed directly to an in-house printer, use the instructions below.
- Search for Merge Letters.
- Click Cancel in the Report Selection window.
- Set the Distribution Method, typically Post, Email, or Use Preferences, then select the required preference type. For Post only, untag Email and Use Preferences.

- Select the required Recipient Type.
- Right-click and select Label Printing/Merge File.
- In the Skip field, enter the number of labels to skip if you want to begin printing from a specific label position.
- Select Configuration
 to set the title to The Resident, if required.
 - Select the Printer menu to set up the printer before printing.
- Select Email List to generate a text file of email addresses that can be copied and pasted into Outlook or a similar application.
- Select Print Labels to print the labels to the selected printer.
- Select Export Addresses to create a text file that can be saved with the mailing addresses.

 to set the title to The Resident, if required.
Exporting Label Data
Create Word Document Label List
If Labels are being produced in-house, the instructions below will assist with creating a Label Template in Microsoft Word.
- Open Microsoft Word.
- Click File > New.
- In the Word ribbon at the top, select the Mailings tab > Mail Merge > Labels.
- Choose the label type used in the office, under 'Label Vendors', select Avery A4/A5 or the manufacturer that matches your physical label sheets.
- Select the Product number in the list that matches your label pack (for example: Avery L7163).
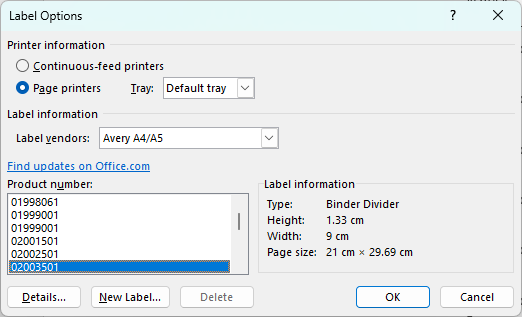
- Click OK.
- Click OK to the message: In Order to apply the selected label options, Word must delete the current contents of Document. Any unsaved changes to this document will be lost.

Optional: Save Your Template
- Click File > Save As.
- Save the template in a network shared folder in order for it to be accessible for multiple users.
Insert the Recipient List
- Go to the Mailings tab.
- Click Select Recipients.
- Choose Use an Existing List.
- Browse to the folder where your exported file was saved.
- Select your Excel (.xlsx) or Merge File (.txt or .csv) and click Open.
- If using Excel choose the correct worksheet and click OK.
- If using a text file ensure the delimiter is correct (usually comma or tab), then click OK.
Insert Merge Fields Into the Label Template
- Click inside the first label on the page.
- Select the Mailings tab > Insert Merge Field.
- Choose the fields required to appear on each label, such as:
- Address Title 1 and Address Title 2.
- On Behalf of 1 and On Behalf of 2.
- Address Line 1, Address Line 2 and Address Line 3.
- Press the Enter key between merge fields as needed to format the label layout.
- Once the first label is formatted, click Update Labels in the Mailings tab to copy the layout to all labels.
- Click Preview Results to check the formatting.
- If adjustments are needed, click Preview Results again to switch back and edit the layout.
- When ready, click Finish & Merge.
- Choose Print Documents or Edit Individual Documents to review before printing.
If the data is a text file format, the header information can be matched using the Match Fields button.
Label Address Priority
The information below explains the address priority used in Report Distribution, which is determined by the Roll, using the available address fields.
Merge Letters / Correspondence
Service of Notice > Residential Address
Levy Management/ Arrears
Levy Notice > Service of Notice > Residential Address
Resident Only List
The lot address editor must be set in the Roll for each lot to generate a resident-only list; the following instructions provide the steps to complete this. This type of list is generally used when correspondence is required for all lots in a building, which may affect the residents.
- Search or select Merge Letters.
- Click Cancel on the report selection screen.
- Review the Distribution Method selections and set for Post and Email. Do not tick UsePreferences.
- In the Recipient Type drop-down select Resident.
- Expand the Filters and tick Owner if no Tenant andUse lot address (if available).
- Right-click anywhere in the table of contacts and click the Export Recipient List to select one option. Only tagged accounts will be exported.
- To Excel: When opening the file, change the Address Title 1 and 2 to a generic title if required. Save this as needed.
- Merge File: This will provide a field option before exporting to set a Resident Title. Check the settings, then click Export Addresses to save to a text file.

