The first step in the Meeting Hub end-to-end process, is to create a new meeting, which is covered in this first section of the guide. The ability to create a new meeting is available to all Meeting Hub users - both with 'Standard' and 'Administrator' privileges.
After creating the meeting, the Meeting Details screen will be displayed, which is covered in the next section of this guide. Please see Meeting Details to learn about that screen.
Select Building
- Search or select Meeting Hub.
- Log in with your credentials.
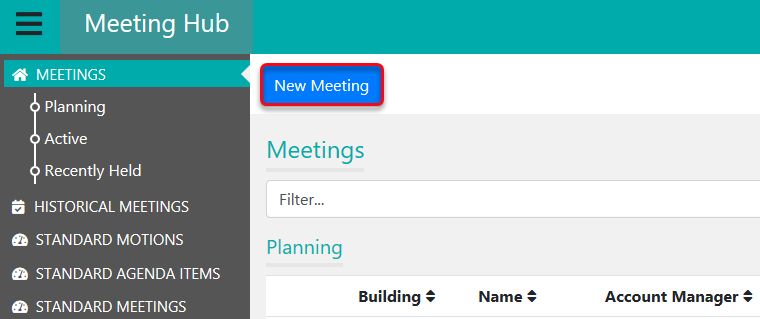
- Click the New Meeting button.
- Click the Select Building... button, and use the search field if necessary to locate and select the required building.
- The Meeting state, Regulatory module and Building type will be selected automatically (synced with Building Information), and are displayed in Meeting Hub to assist with the setup of the meeting. They will affect the meeting content and the way the meeting is run, in particular the meeting state determines the resolution types that are available and how resolutions are determined. If these details are incorrect for the selected building, they can be adjusted in Building Information before restarting the meeting creation process.
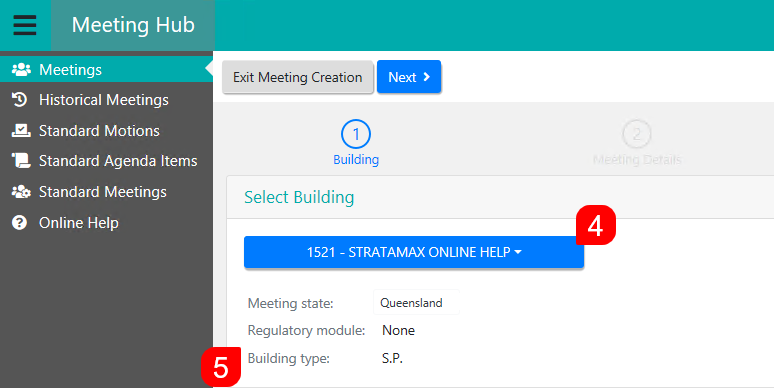
- Click Next to progress to the next screen.


Meeting Date & Location / Ballot
In this screen there are two tick boxes to select; Meeting or Ballot Only:
Meeting
Meeting is for when a meeting needs to take place. Voting can be enabled for this option as well.
- After ticking the Meeting tick box, enter the Meeting Date and Time.
- Start typing the address of the meeting in the Meeting Location field, then choose an address from the list. This will display the selected address in the map area and will be visible in VoteMax.
- There is also an optional Meeting Location Details field, which is a free-text field to provide further details to the owners. This could also be used for a Zoom meeting URL for example.
- Click Next to progress to the next screen.

Ballot Only
Ballot Only is for those occasions where a meeting isn't required e.g. the meeting is by electronic or paper voting only, such as a 'Vote Outside Committee Meeting' or a Flying Meeting. In these cases the date and time that ballot will open and close needs to be configured. This meeting will then be highlighted in red on the Meeting Hub main screen once the voting window has closed and the meeting is ready to be finalised.
You are still able to create a meeting with VoteMax turned off for the benefit of creating a meeting notices. The meeting type would be General Ballot or depending on your state may be voting outside committee (VOC) for Queensland.
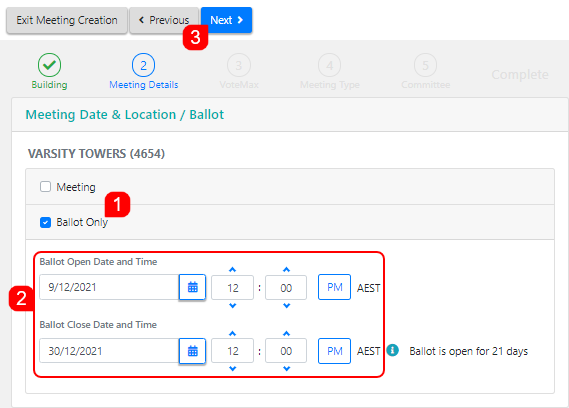
- Tick the Ballot Only tick box.
- Enter the Ballot Open Date and Time and the Ballot Close Date and Time (Note that these are in AEST only).
- Ballots are typically closed after 21 days or if majority of votes have been received.
- Ballots are typically closed after 21 days or if majority of votes have been received.
- Click Next to progress to the next screen.

VoteMax Settings
VoteMax Settings determine if a meeting is visible to lot owners / committee members in VoteMax, and if so, whether voting is enabled before and during the meeting. After selecting and configuring ones of options below click the Next button to progress to the next screen.
Show in VoteMax
By just ticking this box, the meeting will only be displayed in VoteMax. However, attendees will not be able to cast votes before or during the meeting.
Enabled Pre-Meeting Voting
This will display the meeting details to the owner in VoteMax, and allow them to cast and declare their votes electronically before the meeting starts, during the configured voting window.
This will add two more sections to the meeting notice: 'ONLINE VOTING' and 'IMPORTANT INFO ABOUT PRE-MEETING ELECTRONIC VOTING'. These are hard coded into the '"OTS" templates and will either need to be edited on each notice before it is distributed, or you can request a custom template from the StrataMax Support team (costs may apply).
- Tick the Enable Pre-Meeting Voting box.
- In the Voting Open Date and Time field, voting must be set in the future, and the Voting Closing Date and Time field must be set prior to the scheduled meeting date and time. It is also recommended to allow sufficient time for pre-meeting votes to be checked in the Attendance Register, and for any issues to be resolved. Setting the voting window close time no later than 4pm (AEST) will also allow StrataMax to provide support if necessary.

Enable In Meeting Voting
By ticking this box, attendees will be able to join the meeting at or after the configured date and time, and cast their votes, which will automatically update each motion during the meeting, provided the motion outcome hasn't been determined already. You will need to configure Join Meeting Date and Time fields to coincide with the meeting start date and time.

Meeting Type & Standard Meeting Selection
- Click the Select Meeting Type... button to select the type of meeting required. This is state-specific for the meeting types that are available, and the type selected, will determine which Standard Meetings will appear when the Use a standard meeting as a template box is ticked (next step):

- The Use a standard meeting as a template tick box:
- If ticked, a list of saved Standard Meetings will appear to chose from. This will be used as a basis for the new meeting with all of its details, such as motions, template groups, etc. being visible in the Meeting Details screen. If a standard meeting contains a standard motion with an invalid resolution type, an alert icon will be display advising that the standard meeting ‘Contains a Standard Motion with an invalid Required Resolution for a Committee Meeting’. This must be corrected by editing the Standard Meeting first and then starting the meeting creation process again so that the Standard Meeting can be selected.
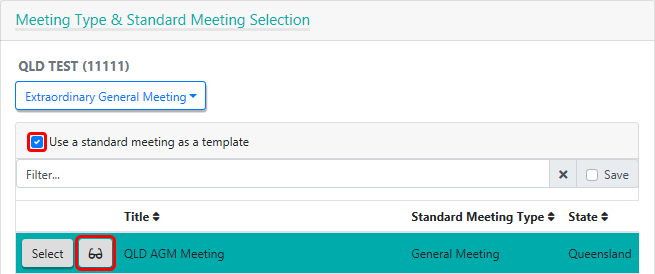
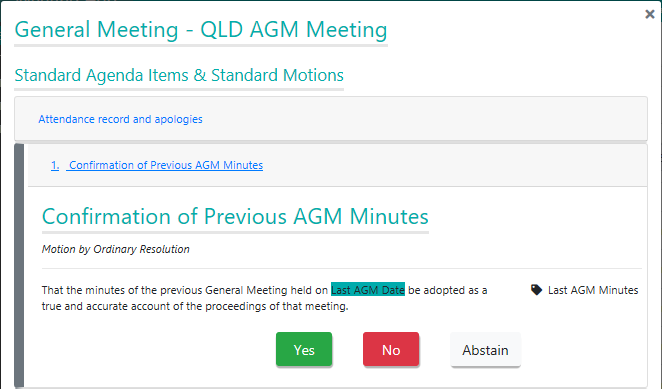
- The Standard Meeting can also be previewed by clicking the 'glasses' button. This will display any Standard Motions or Standard Agenda Items it contains, which can also be previewed by clicking on them. This is how they will appear in VoteMax.
- If not ticked, then the Meeting Details screen will not contain any items such as motions, agenda items, or template groups, which will need to be added manually.
- If ticked, a list of saved Standard Meetings will appear to chose from. This will be used as a basis for the new meeting with all of its details, such as motions, template groups, etc. being visible in the Meeting Details screen. If a standard meeting contains a standard motion with an invalid resolution type, an alert icon will be display advising that the standard meeting ‘Contains a Standard Motion with an invalid Required Resolution for a Committee Meeting’. This must be corrected by editing the Standard Meeting first and then starting the meeting creation process again so that the Standard Meeting can be selected.


- Click the Next button to progress to the next stage.

Committee Member Selection (Committee Meeting only)
If Committee Meeting is selected as the Meeting Type, then a step 5 for Committee Member Selection will be displayed. The list is generated from the members in Office Bearers in StrataMax. The committee members that are selected for the committee meeting can also be adjusted once the meeting has been created. And when distributing the meeting notice, members can be custom selected as recipients.

Complete Meeting Creation
Once all steps have been completed, the details of the new meeting will be displayed in a Summary on the Complete page.
- Click the Create Meeting button to create the new meeting with the details shown.
- This will open the Meeting Details screen. Proceed to the next section in this guide to make further amendments, including generating and distributing the notice.
Use the Previous button to navigate back to previous stages to make changes or select the particular page by clicking on the icon for the page if required.

