 | The instructions in this article relate to Debtor (Second Debtor). The icon may be located on your StrataMax Desktop or found using the StrataMax Search. |
This facility is designed to allow for billing outside of a standard levy process. Examples may include billing for storage spaces or common property rented to tenants or other entities. These debtors can have owner or non-owner records and provide them for various purposes. This type can also exist in a Sub-Group area to facilitate final utility billing.
Second Debtor Accounts are not included in any Levy Arrears processes as charges to Second Debtors are Invoices. Second Debtor Accounts can be included in the Arrears Manager to identify and report overdue accounts.
Add a New Second Debtor
Creating a Second Debtor is a contact that can be billed for anything that does include standard levies. Once the Debtor has been created, this can be used for Invoice Entry (Second Debtor) and Invoice Printing (Second Debtor).
- From either the Main or Sub-Group building search or select Debtor (Second Debtor).
- Click Add New.
- Click Create / Select Contact.
- Search for the contact using the search bar. If there is no contact available, click Create Contact.
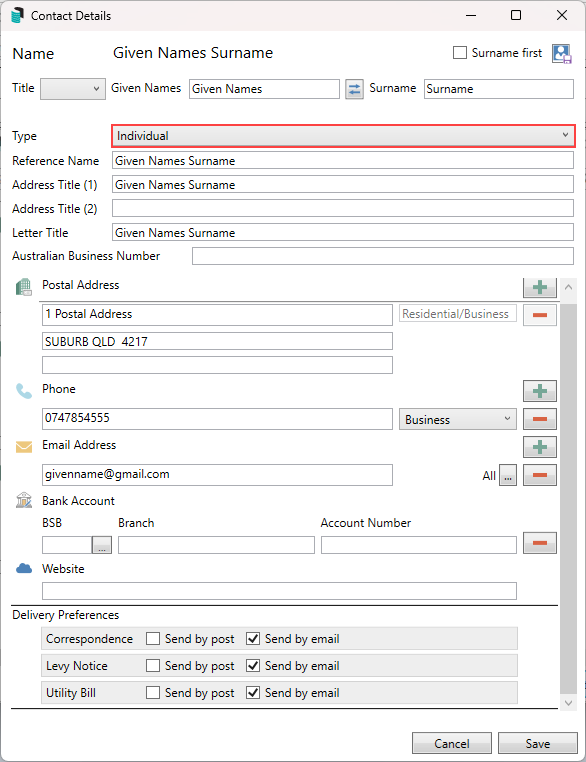
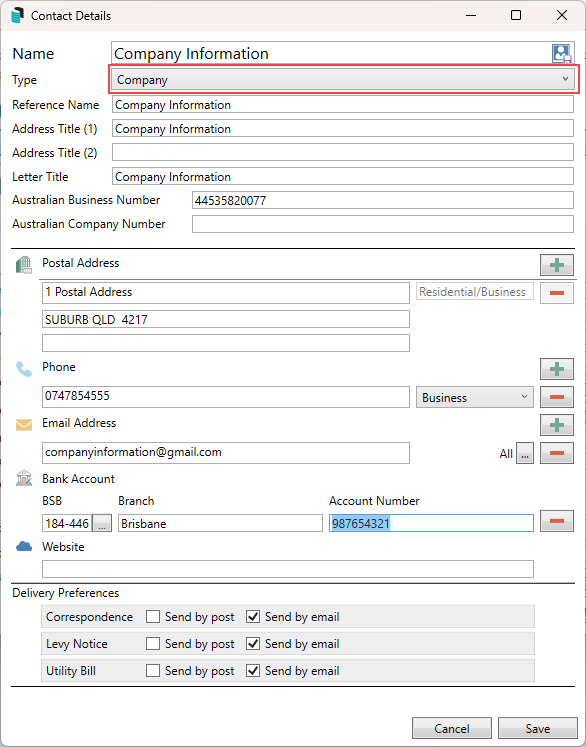
- Complete the field information, changing the type to select the correct record type.
- Individual Type will contain information like this:

- The company will contain information like this.

- Individual Type will contain information like this:
- If there is an email address, set the delivery preference for the contact and click Save.
- Additional fields from the Debtor Maintenance window, including Notes, will be available to complete where required. Click Save to finalise the Debtor Setup.

Add Second Debtor | Add from Owner
Adding a second debtor from an Owner record will allow the contact information to be available in this area and simplify creating additional contacts using the same contact from the Roll. Adding the same contact to this area will mean any updates to the contact information will be in all locations where this contact is used.
- Search or select Debtor (Second Debtor).
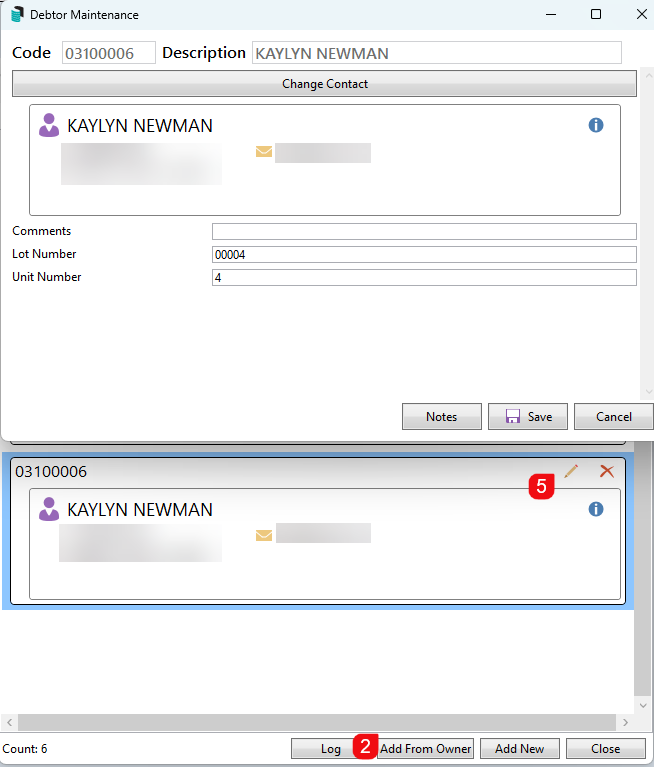
- Click Add From Owner.
- From the Account Code List of Roll records, select the contact required.
- This will add the contact to the Secondary Debtor Maintenance area.
- If the information needs to be reviewed, click the pencil icon to view the contact and field information. The Lot and Unit Number will be populated based on the Roll record.
- Additional fields from the Debtor Maintenance window, including Notes, will be available to complete where required. Click Save if fields are adjusted to finalise the Debtor Setup.

Edit a Second Debtor
Editing a second debtor record will allow for the information to be updated for the contact. A critical understanding of having a contact card used here which may be used in other areas will mean that the edit of information will update in the areas that the contact is used. Refer to the positions of the contact to see where the record will update.
- Search or select Debtor (Second Debtor).
- Click the blue i icon to confirm the positions of the contact.
- Click the Edit button.
- Update the information as needed and click Save.
- When saving the contact there will be a confirmation message: This contact holds multiple positions. Making changes to this contact will affect all of these positions. Click Confirm.
- Click Close.

Delete a Second Debtor
Removing a second debtor that has no transactions and is no longer required can be done using the Delete icon. This can be done from either the Main or Sub-Group area.
- From either the Main or Sub-Group area.
- Search or select Debtor (Second Debtor).
- Search for the contact using the search bar.
- Select the record and click the Delete icon.
- Click OK to message: Are you sure you want to delete this account?.

Debtor (Second Debtor) Sub-Group
Second Debtors can be added to a Sub-Group type building and will facilitate issuing a final bill by taking the Debtor Maintenance record and converting this to a Debtor (Second Debtor) which will retain the same payment reference number. Click here for instructions on this process.


